Protective Styling 101: Guide of 6 Easy Steps
Protective styling natural hair is one of the most talked about topics in the natural hair community.
Most of the time, length retention is the goal. At other times, laziness or lack of time available to do one’s hair is working behind the scenes. I do it for all of the reasons just mentioned.

Whatever your reason for choosing to style your hair in protective styles, this easy guide of steps will help to make the process as seamless as possible.
I. Choosing a Style

The very first step to protective styling natural hair is determining the style you plan to do. When making this decision, it’s important you keep a few things in mind:
- How long will you keep the style in?
- Is it possible to moisturize your natural hair while in the style?
- Will this be a short-term or a long-term protective style?
- How much manipulation is required to create this style?
Some popular hairstyles with varying levels of ease or difficulty include:
- weave installs
- pinned up twists or box braids/plaits on natural hair
- pinned up twists or braids/plaits with synthetic or human hair installed
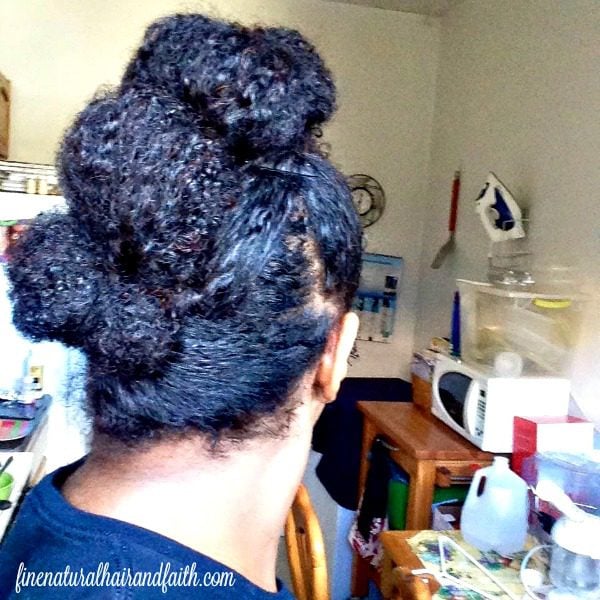
- buns
- bantu knots
- corn rows
- flat twists
Once you’ve decided on what protective style you want to do, you’re ready for the next step.
II. Grab Your Hair Tools

There are a number of items you’ll need to have readily on hand when protective styling natural hair. Here are some suggestions:
- large tooth seamless comb or other curly hair-friendly brush, to aid with detangling
- a rat tail comb for parting
- clips for placing your hair in sections
- bobby pins for securing the style
- satin or silk scarf for protecting the style
In addition to the hair tools you need to create your hairstyle, don’t forget about the hair products you’ll need to add to your hair so that it’s moisturized and the style is in good condition:
- moisturizer cream
- spray bottle with some water in it
- a light oil or oil spray moisturizer
- gel (optional)
- edge tamer (this will make your hairstyle look more put together)
III. Sectioning your hair
Once you’ve decided on your hairstyle and gathered all your hair tools, it’s time to section your hair. Depending on how you’re planning to use protective styling for your natural hair, it’s best to work with your hair in sections.
Even if you aren’t doing a hairstyle that requires you to work in sections, you’re still going to need to work in sections so that you can detangle and get prepared for the next step.
IV. Moisturize!
Adding moisture to your natural hair is crucial before creating and setting any protective style.
Moisturizing can be accomplished by simply spraying a little water on your hair and working it into your strands, following with some sort of lightweight sealant. When protective styling natural hair in a way that requires a bit more manipulation than usual, moisturized strands will be strands that are less prone to breakage.
Alternatively, a cream-based moisturizing product can be used. Creams are a lot more lightweight than butters and work well in fine natural hair.

V. Seal and Set the Style
After your hair is well moisturized, you’ll want to seal that moisture in and then set that style. When protective styling natural hair with twists or braids, that would require a process that looks something like this:
- Adding moisture to the section by way of a spritz or application of a cream
- Following with an alcohol free gel for a bit more hold if desired
- Finishing with a lightweight oil to seal it all in
- Focusing additional attention on the ends by double sealing them
Oil can be applied before a gel, as well. A gel is typically used to help “set” the style while the oil is used to help seal the style. The order in which you apply these two products (if using a gel), is up to you. Also, I recommend a flaxseed gel.
The gel is optional. The oil is not.
When you retire for the evening (or whenever you go to sleep), don’t forget to tie your hair down with that satin or silk scarf. It will preserve the neatness of your hairstyle for much longer. It also helps your hair to retain moisture.
VI. Give your hair a break
Your beautiful protective style is complete, and now it’s time to simply, leave your hair alone.
The purpose of protective styling natural hair in the first place is to give the strands a rest from manipulation caused by daily styling.
While you’re giving your hair a much needed break from manipulation by styling it protectively, you also want to take time away from protective styling; giving your hair a break from that as well.
Don’t just protective style indefinitely. You need to keep your scalp and hair clean, conditioned and regularly moisturized. That means at some point (sooner rather than later), you need to take that protective style down and handle your business.
Timeframe for Protective Styling Natural Hair
5-7 days is a good rule of thumb for determining how long to keep a short term protective style in your hair. Think, buns and roll/tuck styles.
Of course, when you add braiding hair or other pieces of hair to your style, you won’t likely want to remove the style any time soon but bear in mind, the longer you keep the style in, the more shed hair is being trapped.
Taking your hair down to moisturize and remove shed hair is not something you want to put off indefinitely.
The next time you choose to protective style your natural hair, follow these steps to move through the styling process much smoother.
Frequently Asked Questions
A true protective style is one that keeps your ends tucked away. It’s goal is to minimize daily manipulation, while also not creating excessive tension on your scalp or hairline. Even if a style hides your ends, if it causes pulling at the root or puts your hair at risk of breakage, it is not protective for your hair.
While there are many who have retained their hair’s length without wearing protective styles, doing so just helps support the goal. It’s a tool that helps make retaining length easier.
This is especially important to know especially if you get your styles installed by someone else. Here are some signs to look out for that give you a clue that your protective style is doing more harm than good:
– your scalp feels sore
– your roots and/or ends appear very frizzy
– persistently dry strands
If your hair seems to have lost whatever length its grown, it’s time to reevaluate your choice of style and styling practices.


Enjoyed the tips
🙂