Fall Protective Hairstyles for Natural Hair: 7 Easy Styles
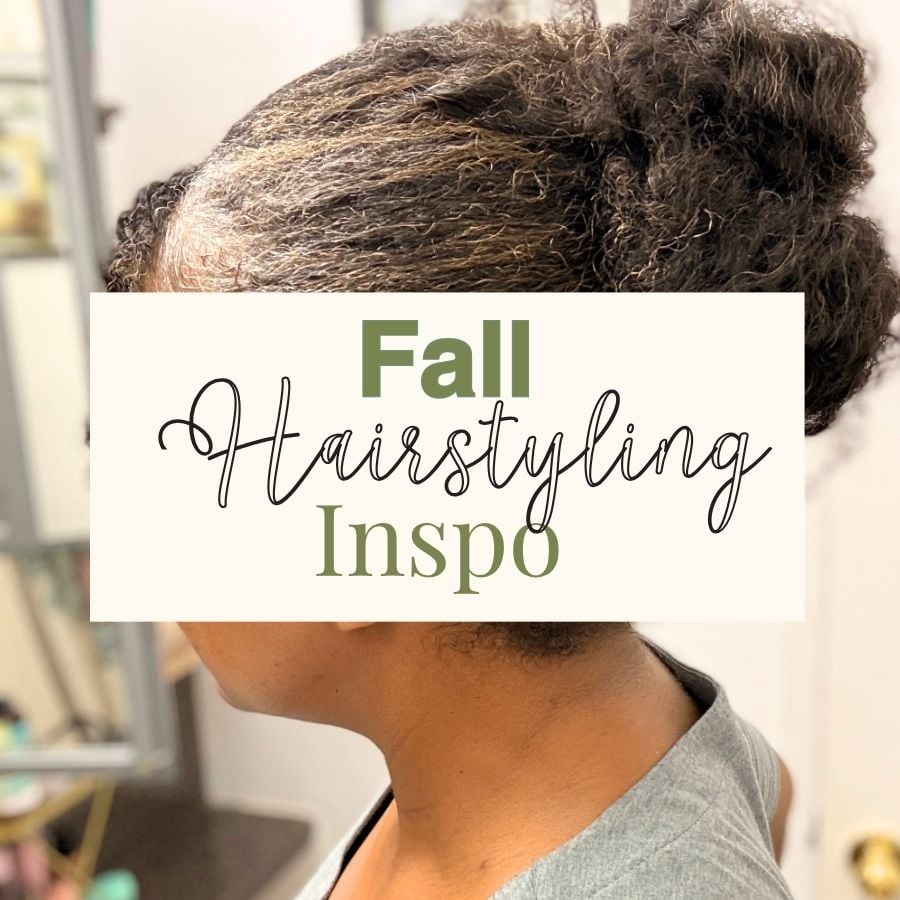
Fall is the official unofficial start of protective styling season. Basically, it’s not a written law, but if you know you know!
So, the styles I’m about to share are base styles that can be done in a number of ways. I like to rotate through these fall protective hairstyles on my fine natural hair. Most of them are quick and easy, taking under fifteen minutes.
Since my ends are tucked away, these are full protective styles. Even when there’s a hanging braid or curl, the style is protective because there are no ends being rubbed against material.
There is, however, one suggested style base that is more low manipulation than protective. I’m including it because it’s a great base for a variety of different hairstyles so if you are looking for styling inspiration, you’ll get it here.
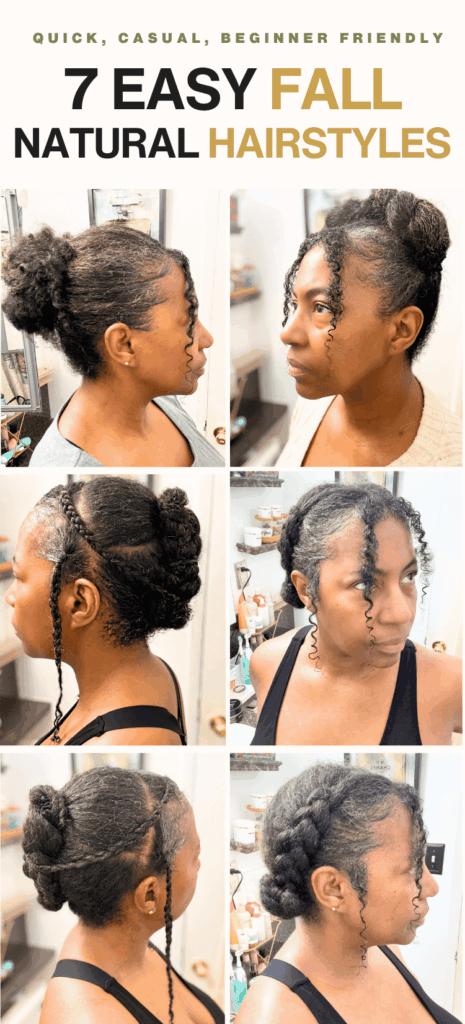
1. Hair Buns: Low, Mid or High
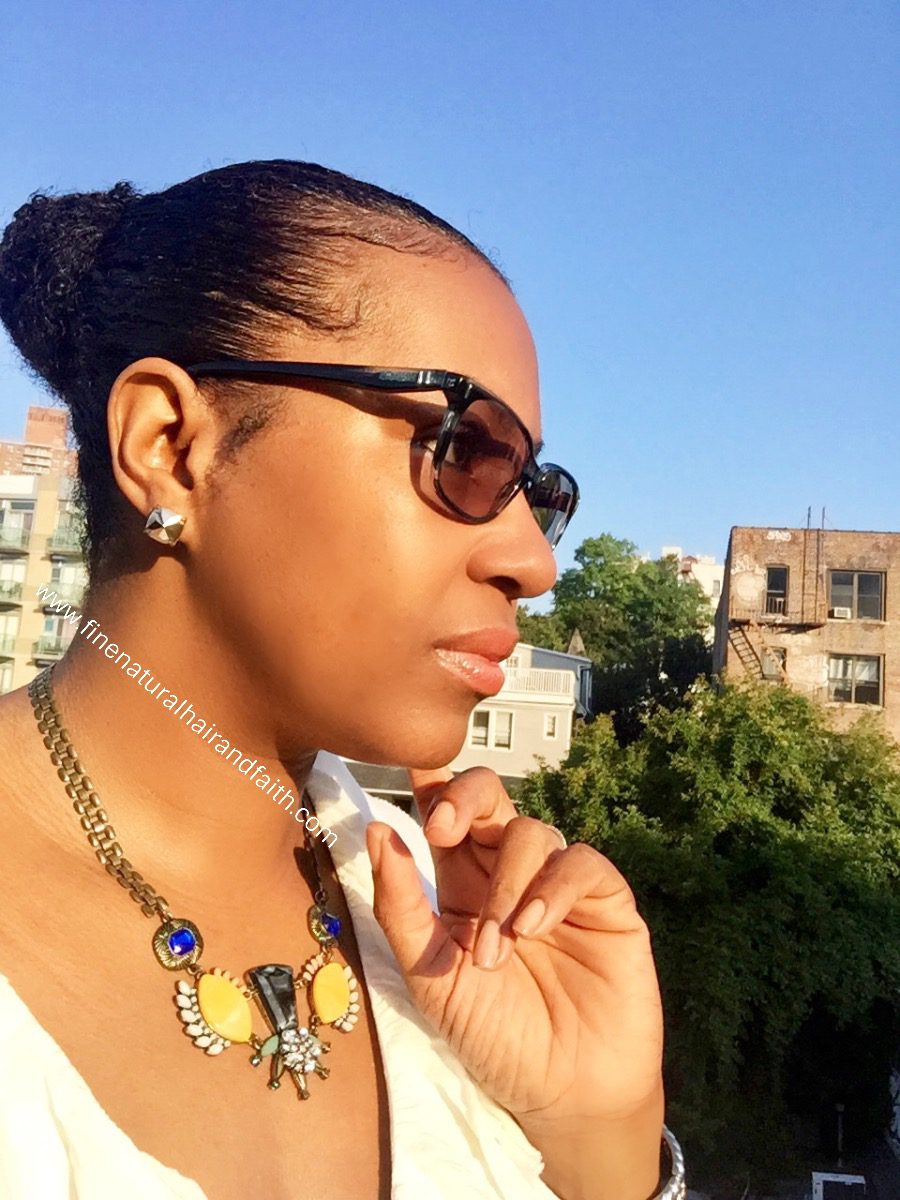
The bun does everything. Ends tucked, survives a workday, and the same technique at three different heights never reads as the same style twice.
How to do it: Stretch your hair first, whether that’s a blowout, a braid out or banding. Gather it loosely at the height you want, secure with a thin satin scrunchie instead of an elastic, wrap the length around the base, and pin all the loose hair in place. This doesn’t have to be neat. Everytime you do it, the look can be different.
Then, smooth your edges with your fingers and favorite edge control. Mine is this one right here.
Move the bun height from week to week so the tension isn’t sitting in the same place every time. That’s what saves your edges long term, especially if your hair is on the finer side.
See this article: Natural Hair Low Bun Protective Style
Want more options? I have 25 bun hairstyles for natural hair, all done on my own fine hair.
2. Mid Height Bun with Curls
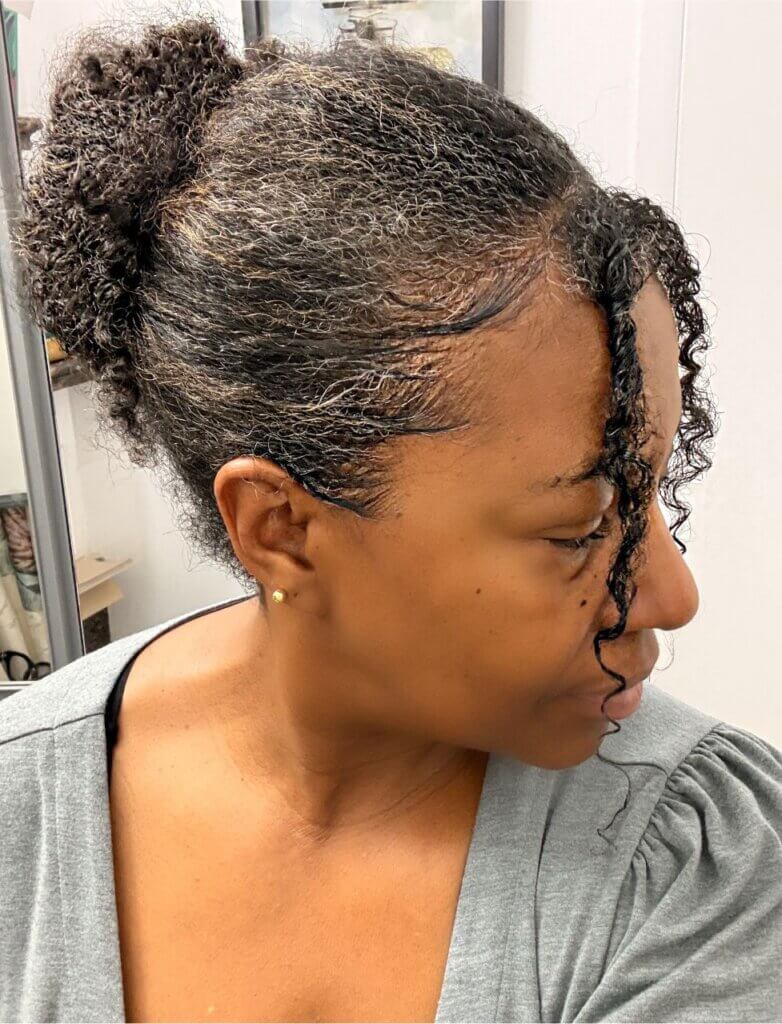
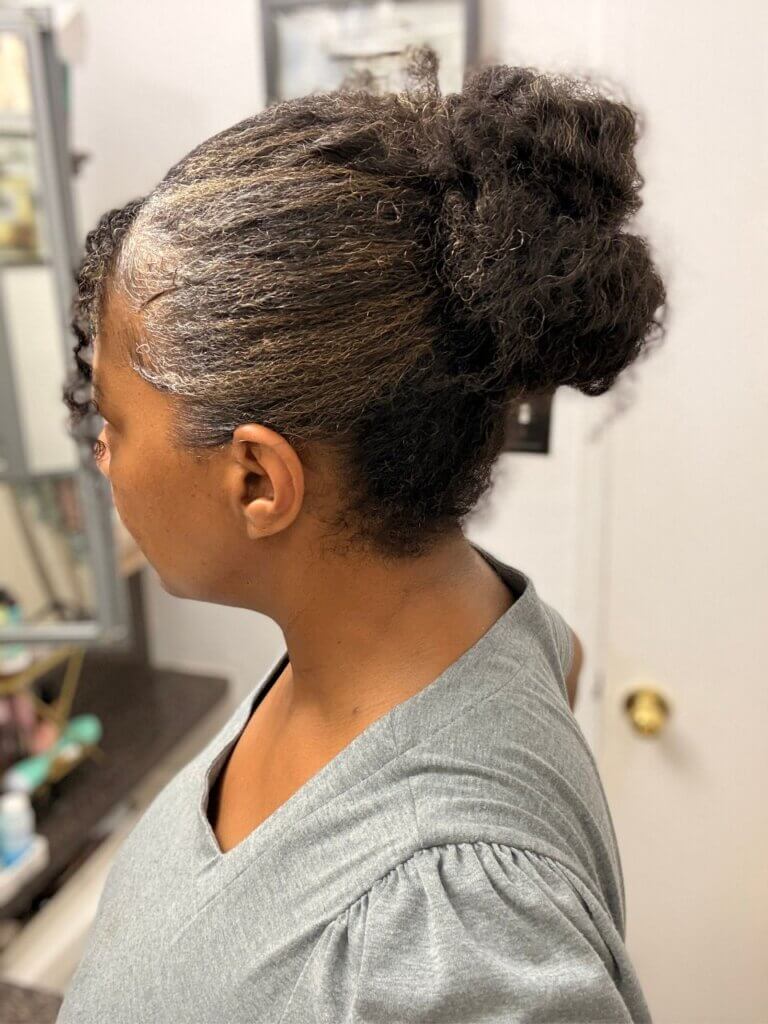
All the protection of a mid-height bun, but your edges are styled with curls in the front so it frames your face.
How to do it: Leave out curly pieces in the front and some baby hairs (but not too much) before you gather everything else into a mid-height bun. You can also do a low bun.
Once the bun is secured and pinned how you like, define the pieces you left out with a light gel or curl cream. Go easy. Heavy gel on fine strands gets crunchy and can flake.
You get softness around your face without leaving out a whole section that has to be restyled every day.
3. Double Braided Buns
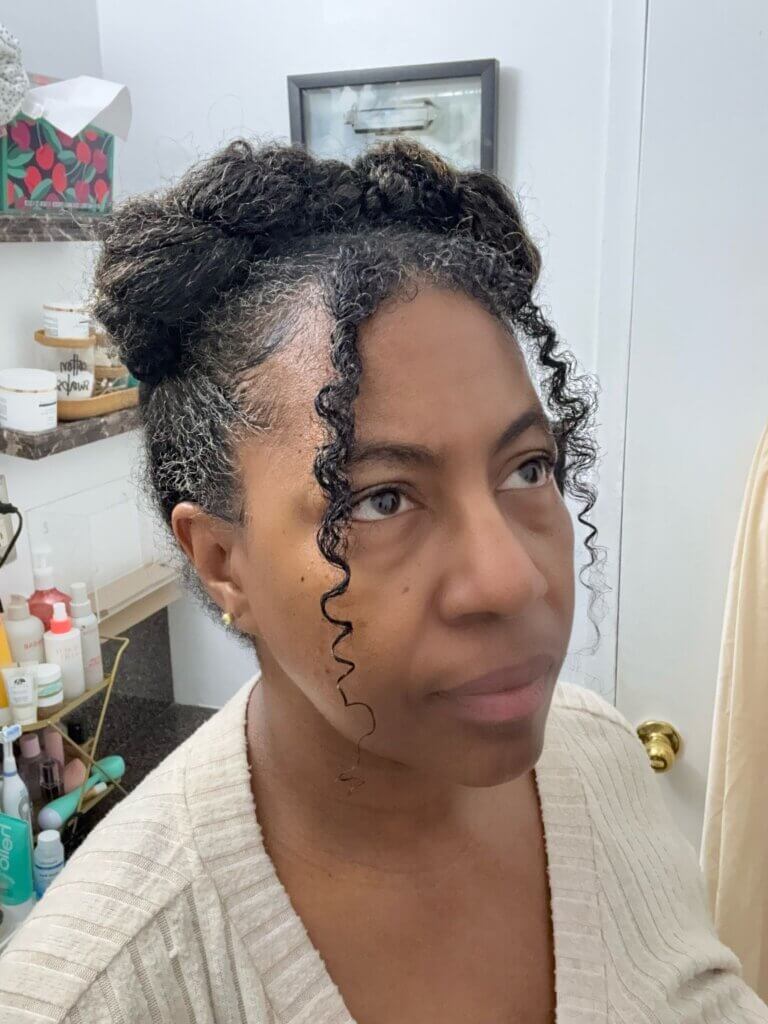
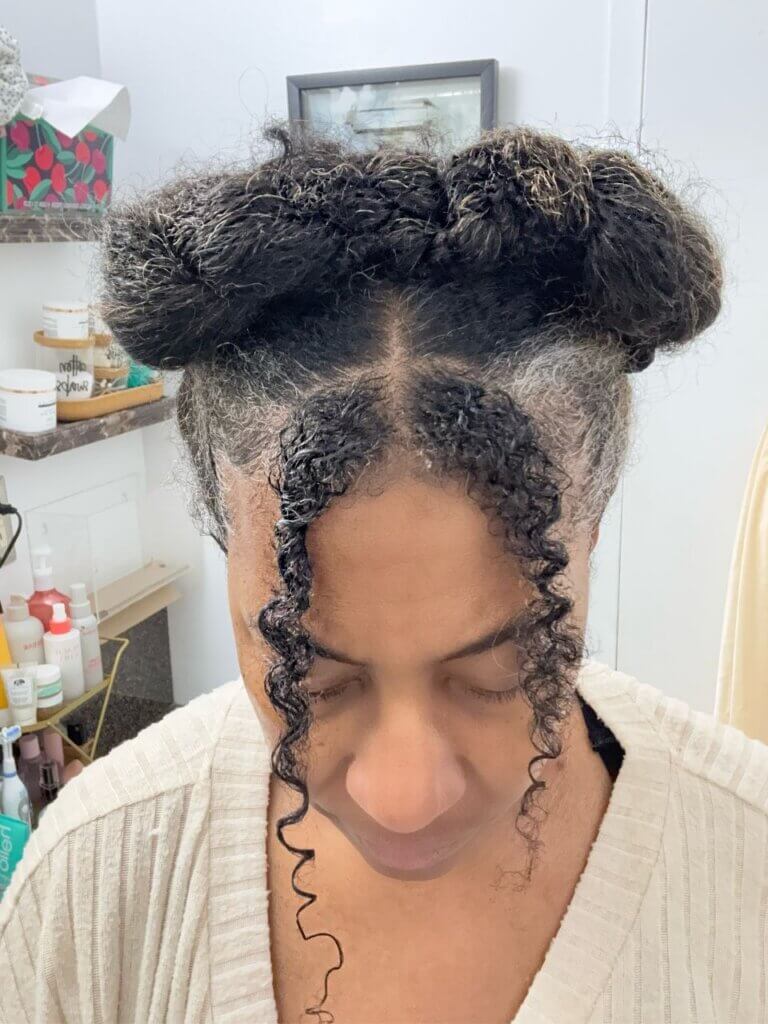
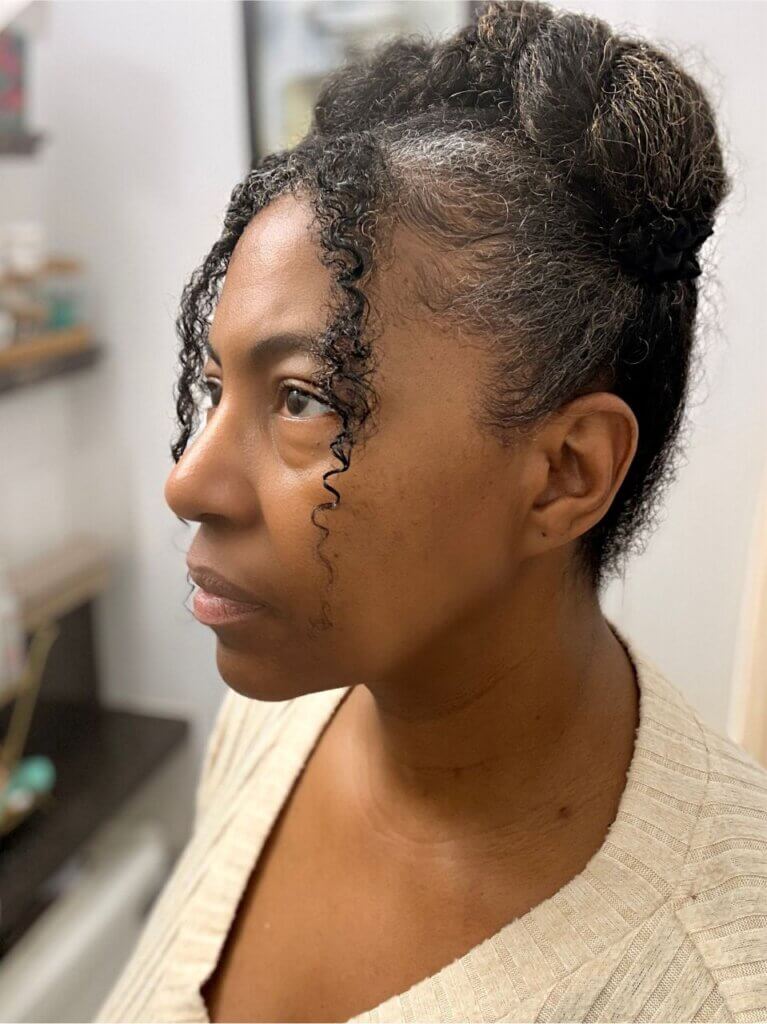
Two braids, two buns, sitting side by side across the back of your head.
How to do it: Part down the middle. Braid each side loosely, then wrap each braid into its own bun and pin. Wear the braids on day one, then bun them for the next few days.
The weight splits across two sections instead of pulling from one, and you get two styles from one install. Braid loosely at the root, because each braid is carrying half your head.
4. Two Flat Twists into a Bun
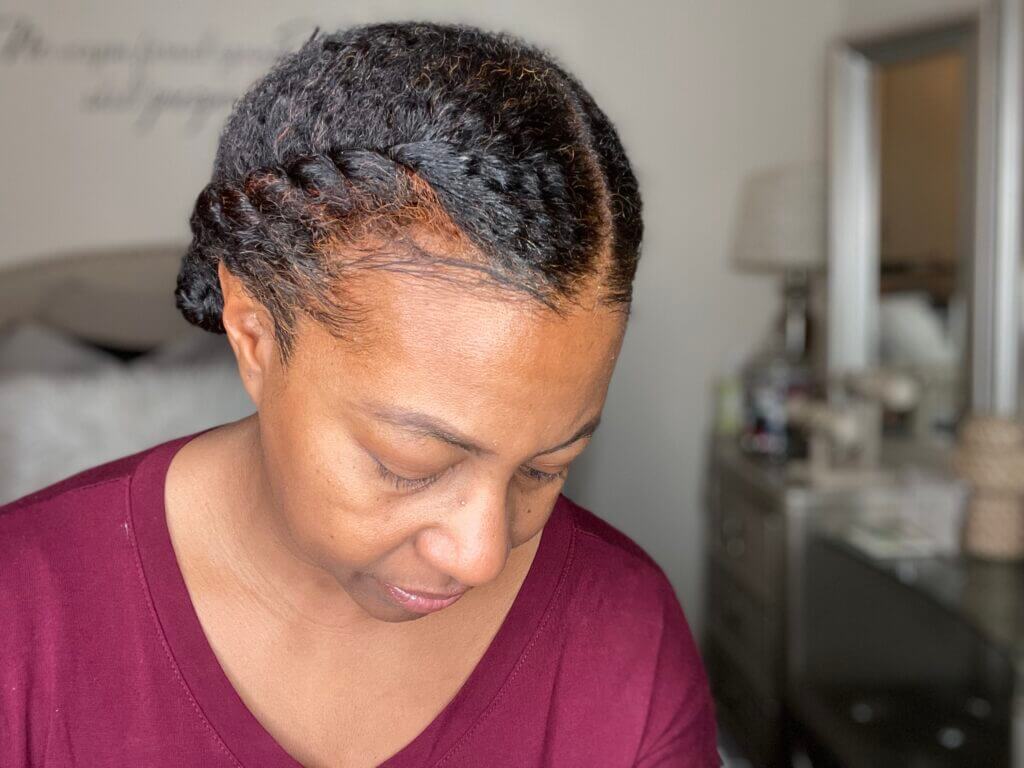
This style was done with flat twists (one on each side). However, if you don’t know how to flat twist, you can just roll the hair toward your scalp. This takes about 5 minutes once you’ve done it a few times.
How to do it: Part your hair down the middle. Flat twist each side going straight back. Secure each flat twist with a clip when finishing so that you can then gather the twists into a ponytail, which you can then wrap into a bun. Alternatively, each flat twist can wrap into its own bun.
Flat twists put less tension on the root than cornrows do, so you get a detailed look without stressing your hairline. That’s the reason this one is a favorite of mine with fine strands. The bun underneath stays simple because the twists are doing the visual work.
Check out my bun roundup for more fall protective hairstyling inspiration.
5. Two Large Cornrows into Messy Buns with Face Framing Curls
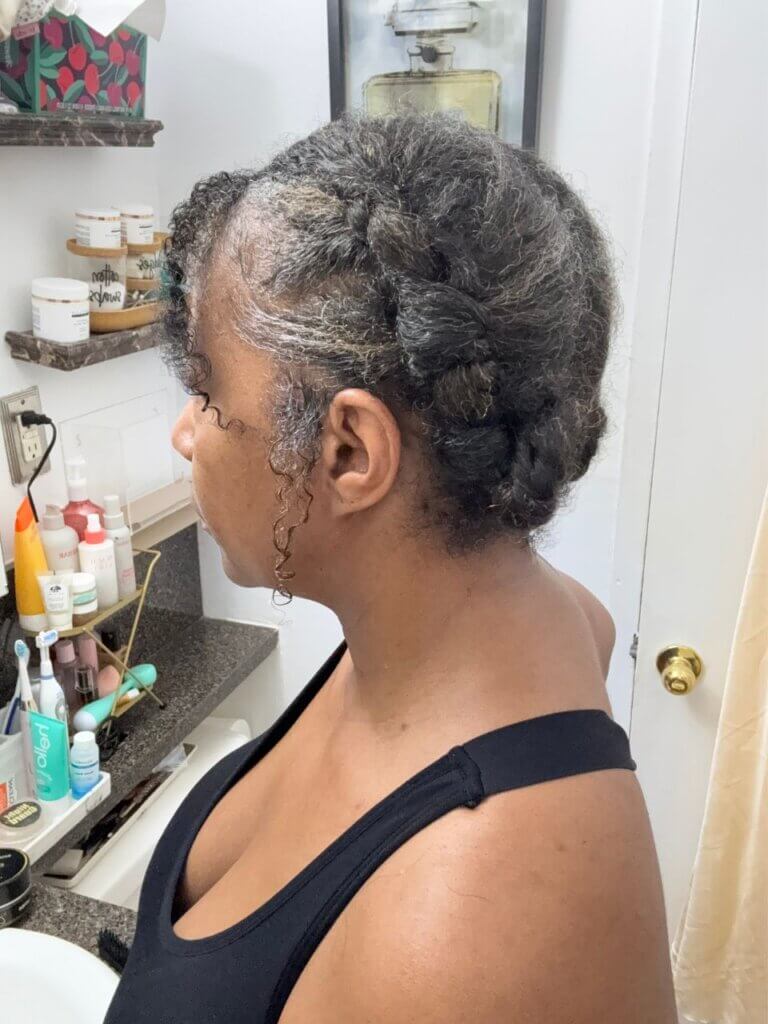
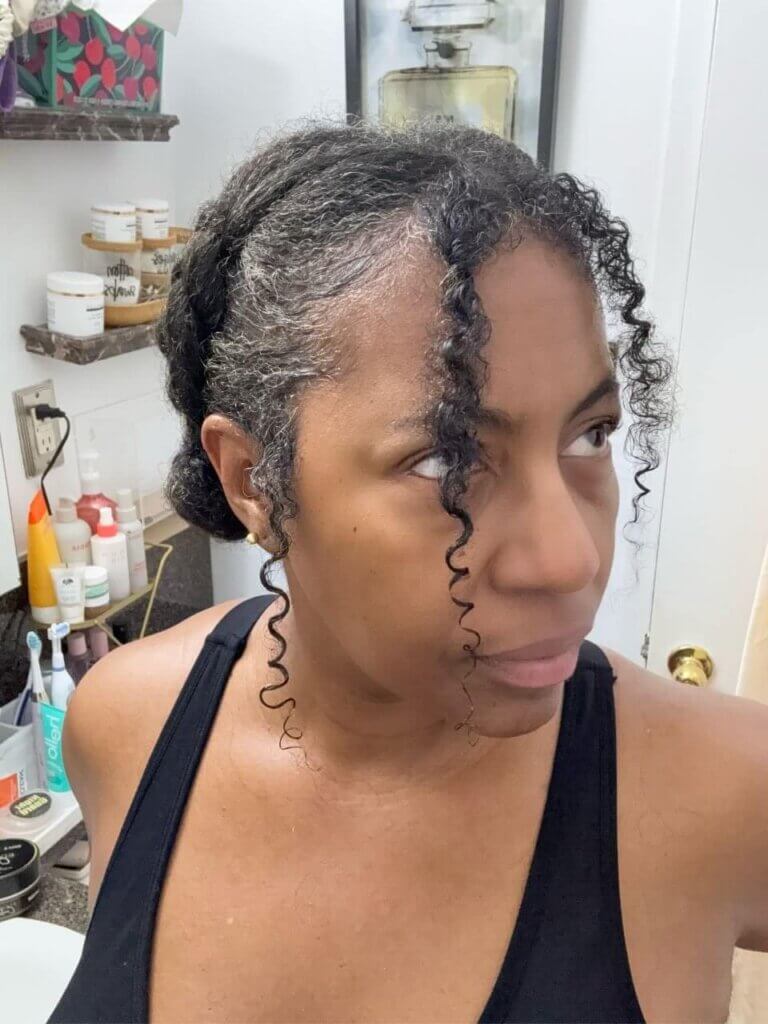
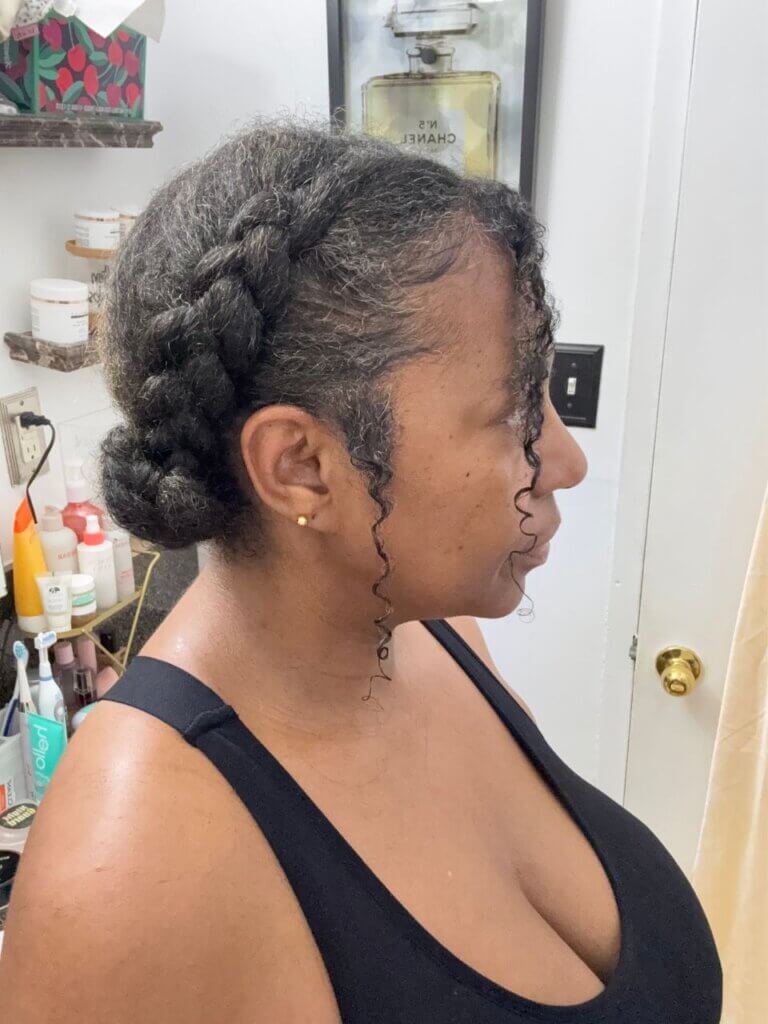
Two big “braids” going back, each one ending in a loose knot. Less than half an hour, start to finish.
How to do it: Part down the middle. Cornrow each side going straight back, stopping a few inches from the ends. Wrap each braid’s end into a loose knot and pin in place.
If you don’t know how to cornrow, notice the “Connected Braids” image (first image). This was done with 3 braids connected to one another. The look is different, but hey, if you can’t cornrow, you do what you gotta do!
Here’s a demo:

Also, large is the whole point. Two big sections spread the tension wide instead of concentrating it, and the install and takedown are fast, which means less handling. Small cornrows on fine hair take forever and pull more hair than they’re worth.
6. Twist Outs and Braid Outs

I could not do a fall hairstyle article without including a braid out or twist out as a base style.
While this isn’t genuinely a protective style because the ends are exposed, it is a low manipulation, which means you set it once and then handle your hair very little for the next several days.
I love braid outs and twist outs because once you’ve worn your hair down, they can easily be converted to a protective style
How to do it: I like to do twist outs and braid outs one of two ways. For longer-lasting definition, twist or braid your damp hair. Let it dry completely before taking down the twists to separate and fluff. For more elongated hair that’s less at risk of tangling, twist stretched, preferably blown-out hair that’s twisted with a light styler while the hair is warm.
Your strands stay clumped together instead of moving freely against each other, which is most of the benefit and matters more the finer your hair is. On day three it goes up into a bun, which is how a low manipulation style converts into a protective one without a wash day in between.
Want more ideas? Check out my low manipulation styles using Waveformers.
7. Braided Styles
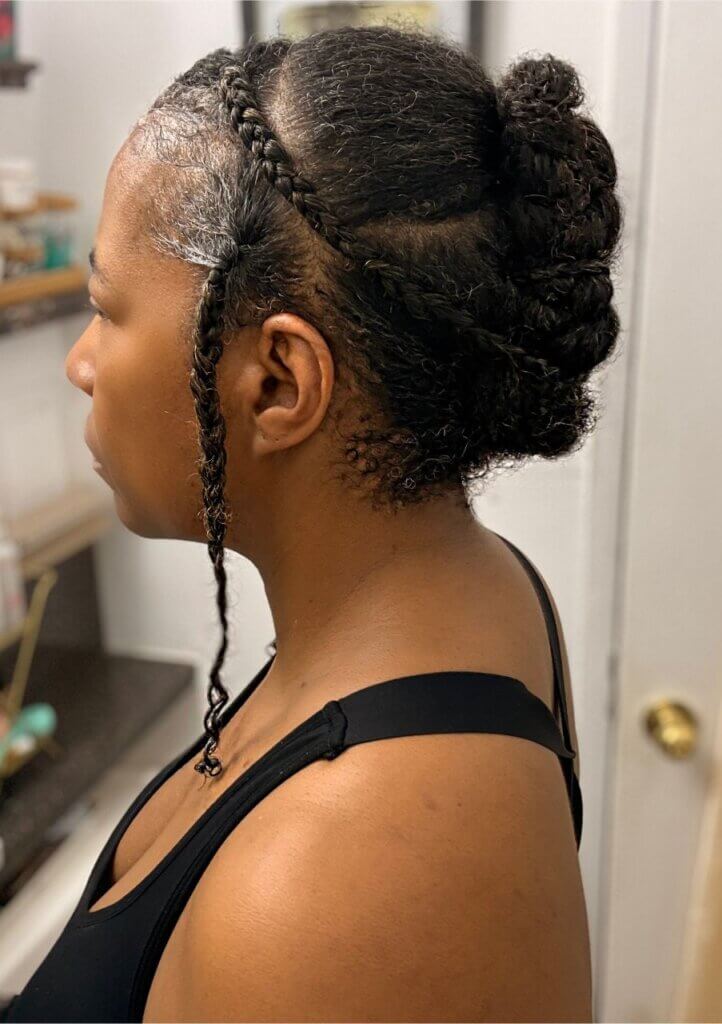
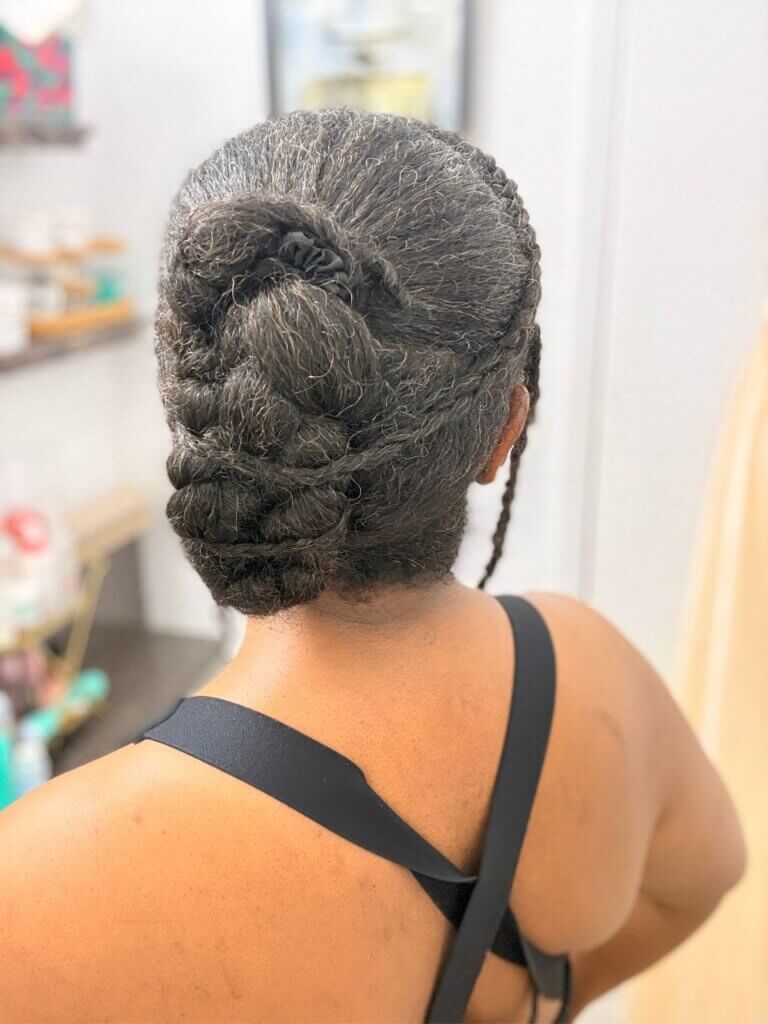
When you want protection that still looks dressed up, use a combination of small and large braids. This style is great for any season, really, and looks elegant and finished enough for church.
How to do it: Section out the front of your hair so that you can create 4 braids – 2 in the center and 2 on the sides. Then, gather the top into a loose high ponytail using a black (or color of your hair) thin silk/satin scrunchie. Secure it and repeat with the bottom sections. The 2 ponytails should be as close together as you can get them.
Once both ponytails are secured, braid each one. Wrap the bottom braid up toward the top and around that ponytail section. Secure with a bobby pin. Then, wrap the top braid down toward that ponytail, around its base, and secure with a bobby pin.
Lastly, take the 2 middle braids, pull them back on their respective sides, and crisscross them over the 2 braided “ponytail” sections. Pin them in place, and you’re done. This definitely looks more difficult than it is.
There are so many different ways to do braids and to be transparent, I never do them with added hair. See my Crown Braid on Natural Hair and 7 Braided Hairstyles for Long Hair.
And if you want the full fall hair care reset for fine natural hair, yeah read that.
Best Practices for Styling Natural Hair
One thing that’s great about natural hair is how versatile it is. You can style your hair in ways that show off your natural curl pattern, as I did, or you can style it in these same styles when your hair is pressed straight.
A few things to keep in mind when styling your hair so that you can enjoy the styles with no damage:
Choose convertible styles. A style that becomes another style without redoing your hair means fewer install and takedown cycles. The takedown is where fine hair is at an increased risk of getting damaged.
Braid and twist loosely at the root. Tension at the hairline is what you pay for a style that looks neat on day one and thins your edges by spring.
Protect your ends before you tuck them. Try a simple mixture of rosemary essential oil mixed into a carrier oil, smoothed over your ends, and then double seal them with a heavier oil, butter-based product, or alcohol free gel. Flaxseed gel is the gold standard.
Don’t leave a style in for too long. A protective style protects your hair while you wear it, but if you leave it in too long, that protection becomes a liability.
Care for your scalp underneath. Weeks in a style doesn’t mean weeks without cleansing. See Reboot Your Hair in 6 Steps: Step 3 — Scalp Care.
Pick one style, wear it well, and let your hair rest.
Breakage on Your Natural Hair?
A protective style isn’t automatically protecting anything if other factors are at play. If it’s installed too tight, left in too long, or taken down carelessly, it costs you the length you worked so hard to grow.
I wrote about this in more detail here: 5 Ways You’re Sabotaging Your Protective Styles.
And if you’ve fixed the install, fixed the takedown, and those little broken pieces of hair still keep happening, something more specific is going on.
That’s where The Breakage Detective comes in. It walks you through a series of questions to help you identify what’s causing the breakage in your fine hair, so you can address the actual problem.
Find out what’s causing your hair breakage with The Breakage Detective. You’ll get an analysis plus specific resources to help you fix it.